A great manicure isn’t about expensive tools — it’s about doing the steps in the right order and not rushing the parts that matter. Follow this process and you’ll get results that hold up just as well as a salon visit, at a fraction of the cost.
Key takeaways
- Wiping nails with polish remover right before painting removes oils and is the #1 reason salon manicures outlast rushed ones.
- Two thin coats beat one thick coat — thin coats dry faster and chip less.
- Cuticle oil applied daily extends wear time, not just appearance.
In this article
- What You’ll Need
- Step 1: Remove Old Polish and Shape
- Step 2: Soak and Care for Cuticles
- Step 3: Buff and Prep the Nail Surface
- Step 4: Apply Base Coat
- Step 5: Apply Color in Thin Coats
- Step 6: Seal With Top Coat
- Step 7: Finish With Cuticle Oil
- Tips to Make It Last
- Common Mistakes That Shorten Wear Time
- Frequently Asked Questions
- Keeping Your Natural Nails Healthy Between Manicures
- Tools Worth the Investment
- Troubleshooting Common Problems
- How to Tell When It’s Time to Redo, Not Just Touch Up
- Nail Health Between Manicures
- Getting Faster With Practice
- A Final Word on Consistency
What You’ll Need
- Nail polish remover and cotton pads
- A glass or fine-grit nail file
- Cuticle pusher (and cuticle remover, optional)
- Buffer block
- Base coat, polish color, and top coat
- Cuticle oil
Step 1: Remove Old Polish and Shape
Remove any existing polish completely, including around the edges where color tends to hide. File each nail in one direction rather than sawing back and forth, which weakens the nail and causes peeling. Choose a shape that suits your nail bed and lifestyle — square for durability, oval or almond for a softer look.
Step 2: Soak and Care for Cuticles
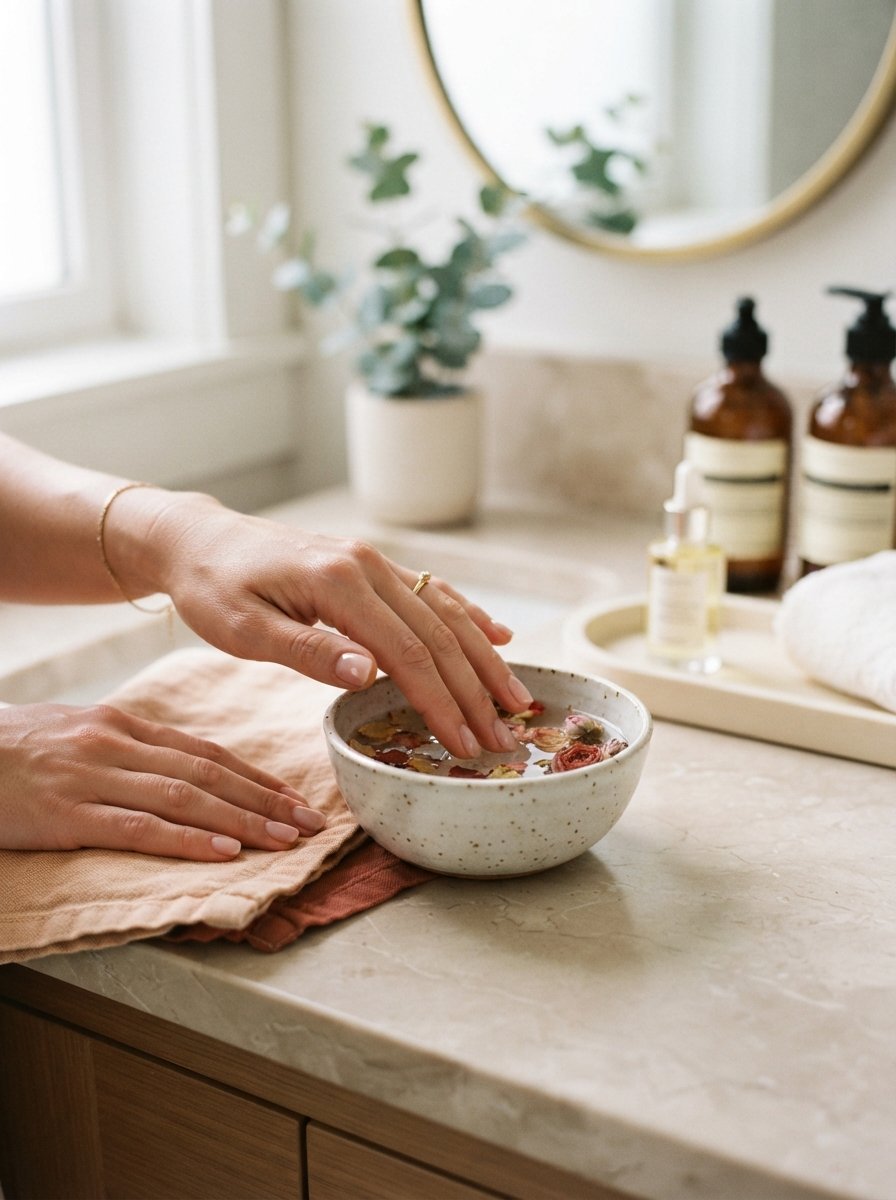
Soak your hands in warm water for a few minutes to soften cuticles, then gently push them back with a cuticle pusher — never cut living skin, which can lead to infection. If you use a cuticle remover product, follow the instructions and rinse thoroughly afterward.
Step 3: Buff and Prep the Nail Surface
Lightly buff the surface of each nail to smooth ridges — this isn’t about making them shiny, it’s about giving your polish a clean surface to grip. Wipe each nail with a bit of polish remover on a lint-free pad right before you start painting to remove any oil residue; this single step is the biggest reason salon manicures last longer than rushed at-home ones.
Step 4: Apply Base Coat
A thin layer of base coat protects your natural nail from staining and helps color polish adhere evenly. Let it dry fully — about a minute — before moving on.
Step 5: Apply Color in Thin Coats
Use two thin coats rather than one thick one; thick coats take longer to dry and are far more likely to smudge or peel early. With each coat, start slightly above the cuticle, sweep down the center, then fill in each side, capping the free edge of the nail as you go to seal the color and prevent tip-chipping.
Step 6: Seal With Top Coat
A good top coat is what separates a manicure that lasts a week from one that chips in two days. Apply it the same way as your color, capping the tips, and let it cure fully — avoid touching anything for at least 10–15 minutes.
Step 7: Finish With Cuticle Oil
Massage cuticle oil into the skin around each nail once the top coat is dry. This keeps the surrounding skin looking healthy and, done daily, actually extends how long your polish stays chip-free by keeping everything hydrated and flexible.
Tips to Make It Last
- Wear gloves for dishes and cleaning — water exposure is the number one cause of early chipping.
- Avoid using your nails as tools (opening cans, scratching labels).
- Reapply top coat every 2–3 days to refresh shine and seal in the color.
Once your manicure is done, browse our fall nail design ideas for color and pattern inspiration to try with this exact technique.
Common Mistakes That Shorten Wear Time
- Skipping the oil wipe-down before polish. Natural oils on the nail plate are the number one reason at-home manicures chip within a day or two.
- Applying polish too close to the cuticle. Leaving a tiny gap keeps the edges cleaner as your nail grows and makes the whole manicure look more deliberate.
- Not capping the free edge. Forgetting to run the brush over the very tip of the nail with each coat is the fastest way to get chips within 48 hours, since that’s the point of most daily impact.
- Rushing dry time. Polish can look dry on the surface while still soft underneath for up to an hour — this is when most smudges happen.
Frequently Asked Questions
How often should I redo a full manicure?
Most regular polish manicures hold up well for about a week; refreshing just the top coat every few days in between extends that further.
Is buffing bad for your nails?
Occasional light buffing is fine, but buffing too often or too aggressively thins the nail plate over time. Once every manicure cycle is plenty.
What’s the fastest way to dry polish at home?
Quick-dry topcoats help significantly, and running your painted nails under cool (not cold) water after a few minutes can speed up the surface set. A small fan pointed at your hands also works better than blowing on them yourself.
Keeping Your Natural Nails Healthy Between Manicures
A great manicure only looks as good as the nail underneath it. Give your nails an occasional break from polish entirely, keep cuticle oil in rotation daily (not just on manicure day), and avoid using acetone more than necessary — it’s effective at removing polish but also strips moisture from the nail plate with repeated use.
Tools Worth the Investment
You don’t need a full salon cart to get great results, but a few upgrades genuinely pay off over time: a glass nail file lasts years and files more gently than emery boards, a proper cuticle pusher (metal, not the flimsy plastic kind that comes in drugstore kits) makes the cuticle step faster and cleaner, and a good quality top coat is worth paying more for than any other single product in your kit — it’s doing the most work to keep everything else intact.
Troubleshooting Common Problems
If your polish always bubbles, you’re likely applying coats too thickly or too quickly one after another — give each layer a full minute before adding the next. If color always pools at your cuticle, try starting your brush stroke slightly further up from the base and working outward instead of starting right at the skin. And if your manicure always seems to chip first at the tips no matter what you do, double-check that you’re actually capping the free edge with every single coat, including the base coat — it’s the step most people skip without realizing it.
How to Tell When It’s Time to Redo, Not Just Touch Up
A small chip on one or two nails can usually be spot-fixed with a matching dab of polish and a fresh top coat. But once you notice lifting at the base of multiple nails, visible growth gaps, or polish that’s gone dull and cloudy across the board, it’s more efficient (and better looking) to remove everything and start fresh rather than layering touch-ups on touch-ups.
Nail Health Between Manicures
The healthiest nails come from consistent small habits rather than occasional intensive treatments: keep hands moisturized daily, wear gloves for cleaning tasks, and give nails an occasional few days completely bare to breathe, especially after several manicure cycles in a row. Brittle or peeling nails are often more about hydration and protection than any single product you’re using on top.
Getting Faster With Practice
Your first few at-home manicures will likely take closer to 45 minutes than the 20 minutes a practiced routine eventually takes. Don’t rush the early attempts trying to hit a speed benchmark — the steps that feel slow now (careful cuticle work, thin polish coats) are exactly what makes the end result last, and speed comes naturally with repetition.
A Final Word on Consistency
The biggest difference between an at-home manicure that looks salon-quality and one that doesn’t usually isn’t skill — it’s consistency in following every step, every time, even the ones that feel unnecessary. Skipping the oil wipe-down “just this once” or rushing dry time is almost always where the shortcut shows up a day or two later.